Blog

  • Dentin Hypersensitivity and its Etiology

    Dentin Hypersensitivity and its Etiology

    Did you know that dentin hypersensitivity is among the most frequent complaint of patients? At the same time, dental practitioners least understand it as the little emphasis is given to this important yet common dental condition. This blog will provide a basic guideline that will help you better understand key concepts, etiology, and theories of dentin hypersensitivity.

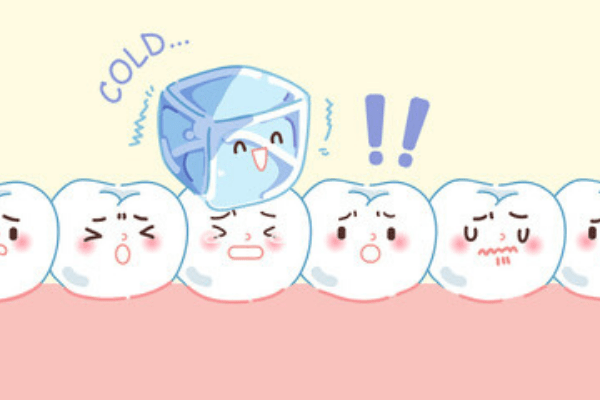
    The dentin hypersensitivity is associated with a short sharp pain that arises from the exposed dentin and occurs in response to various stimuli such as tactile, chemical, thermal, and osmotic stimuli. The terms‘ dentin sensitivity’ and ‘dentin hypersensitivity’ are used interchangeably in the literature, but dentin hypersensitivity is more accurate. Other terms that are less commonly used to describe the hypersensitive dentin in the literature are cervical hypersensitivity, root hypersensitivity, and cementum hypersensitivity.

    The dentin hypersensitivity has a detrimental effect on the quality of life of an individual as it affects the physical and psychological well-being of the patient. The dentin hypersensitivity also affects the selection of diet and makes oral hygiene maintenance difficult.

    The hypersensitive dentin is a commonly encountered and least understood dental complaint, and its incidence is reported between 10% to 15%. This problem mostly affects young adult females between 20-40 years of age. The tooth surfaces commonly associated with dentin hypersensitivity are the labial surfaces of canines and buccal surfaces of premolars, especially in the dentition with gingival recession.

    In the hypersensitive dentin, the exposed dentinal tubules are patent. In some cases, where the exposed dentin is not hypersensitive, there is a more like a hood that the dentinal tubules are occluded with the deposition of sclerotic dentin.

    Etiology of Dentin Hypersensitivity

    It is important to understand that dentin hypersensitivity is not a disease but a symptom of one or a combination of the following underlying causes.

    Gingival recession

    There are numerous causes of gingival recession. One of the reasons for the gingival recession is the overzealous brushing of teeth. The gingival recession of this kind is typically present on the labial and buccal gingiva of the canines and premolars.

    Attrition

    It is a form of tooth tissue loss that involves the incisal and the occlusal surfaces of teeth. It is mostly seen in individuals with a history of night grinding of teeth (bruxism). These patients are likely to show the symptoms of dentin hypersensitivity.

    Abrasion

    An abrasion is a tooth surface loss that occurs because of tooth brushing with a hard toothbrush, improper tooth brushing technique, or using toothpaste or tooth cleaning powder with a higher abrasive. Abrasion of the enamel due to the over-enthusiastic brushing of teeth is one of the causes of hypersensitive dentin.

    Erosion

    Erosion is a form of tooth surface loss caused by the intrinsic acids (gastric acid due to gastroesophageal reflux disease) or extrinsic acids (overconsumption of citrus fruit juices and drinks) that may result in hypersensitive dentin.

    After dental treatment

    After dental procedures such as periodontal surgery, tooth whitening, scaling, and polishing, there is dentin hypersensitivity in some patients.

    Internal or external resorptions

    Normally the dentine is resorbed during the exfoliation of deciduous teeth. Dentine in permanent teeth is normally stable throughout life. The pathological dentin resorption may be initiated from two surfaces: from the dental pulpal surface, known as internal dentin resorption, or from the surface of the root, known as external dentin resorption. Mostly the causes of this internal and external resorption are unknown, but tooth hypersensitivity may be the earliest symptom.

    Theories of Dentin Sensitivity

    The following three theories have been proposed to explain the dentin sensitivity.

    Direct Innervation theory

    This theory of dentin sensitivity suggests that “Dentinal tubules contain nerve endings that respond to the external stimulus.”
    Several arguments are against direct innervation theory. The specialized histological sections of dentin also confirm that the nerves within the dentinal tubules appear absent in the dentin’s outer part near the dentin enamel junction (DEJ). While in the inner part of the dentin that is towards the dental pulp, very few tubules have nerve endings. Besides, the application of local anesthesia on the exposed dentin does not eliminate the dentin hypersensitivity.

    Transduction theory

     The transduction theory of dentin sensitivity is also known as odontoblast receptor theory. According to this theory of dentin sensitivity “Odontoblasts serve as a receptor and are connected to the nerve endings that are present in the dental pulp”.

    The transduction theory is also not widely recognized because there is no physiological evidence that shows that the odontoblast process is similar to nerve fiber and can conduct the impulses towards the dental pulp. In addition to that, odontoblast processes in most of the tubules are not extended to the dentin- enamel junction (DEJ) and in the majority of the dentinal tubules and the odontoblasts are not connected synaptically with the nerve fibers.

    Hydrodynamic theory

    The hydrodynamic or the fluid movement theory states that” when a stimulus is applied to the dentin it causes fluid movement through the dentinal tubules. This movement of fluid causes depolarization of the nerve endings that are present in the inner part of dentinal tubules and the cell-free zone of dental pulp just below the odontoblastic zone”.

    The fluid movement theory is the most widely accepted theory that explains dentin hypersensitivity. Several findings support the hydrodynamic theory for example when the cavity is prepared small drops of fluid can be seen on the floor of the cavity. The hydrodynamic theory also explains why the application of local anesthesia at the site of exposed dentin fails to block the dentin hypersensitivity.

    Treatment of Dentin Hypersensitivity

    The correct patient history and intraoral examination are important for the diagnosis of any disease or condition and the same is true for dentin hypersensitivity. As dentin hypersensitivity present similar to several conditions such as dental caries, cracked teeth, and irreversible pulpitis. Therefore, the detailed patient history, nature of pain, factors that increase or reduce the pain are important with the intraoral examination to confirm the diagnosis.

    Treatment of dentin hypersensitivity is a complex process and involves several steps such as behavioral modifications, patent education, removing the causative or etiological factors that are associated with hypersensitive dentin, home, and dental office treatments.

     Exposed dentin treatment aims to reduce or eliminate the sensitivity of the exposed dentin. The dental products that are commonly suggested occlude the open dentinal tubules that are desensitizing toothpaste, mouthwashes, and topical agents. These products usually contain calcium phosphate and fluoride ions, silver diamine fluoride (SDF), or a mixture of arginine, calcium carbonate, and fluoride. Recently the use of bioactive glass in the toothpaste has been suggested for hypersensitive dentin treatment as it occludes the open dentin tubules.


    Dentin Hypersensitivity | Video Explanation

    Dentin Hypersensitivity
  • Easy Dental terminology Guide for Students

    Easy Dental terminology Guide for Students

    Dental anatomy is defined as studying the formation, morphology, functions, and identification of each tooth in the dental arch. It also includes the study of the relationship of the adjacent teeth in the same dental turn and with the teeth of the opposing dental arch.

    To have a firm understanding of dentistry and dental anatomy, it is essential to have a clear understanding of the structure of a human toothsurfaces of teeth, and basic dental terminologies used frequently during tooth anatomy study. In addition to that, these terms are essential as they will be used throughout individual dental professional and research careers.

    The following paragraphs will provide you with an understanding of those standard dental terms.

    Cusp

    It is a pronounced elevation or a mound on the occlusal surface of a posterior tooth. The cusp on the deciduous teeth is more pointed and sharp than the permanent ones. The occlusal surfaces of the teeth may have two to five cusps.

    Premolars usually have two cusps (one buccal cusp and one lingual or palatal cusp). The mandibular second premolar has three cusps (one buccal and two lingual cusps).  Therefore, the term bicuspid is not correct for the premolars.

    Maxillary molars crowns may have three to five cusps. When the number of cusps is four, the three cusps are larger (mesiobuccal, mesiopalatal, and distobuccal cusps) and the smallest cusp is the distopalatal cusp. In maxillary second and the third molars sometimes the distoplatal cusp is not present and the tooth is of three cusp type. In the maxillary first molar sometime a small cusp or tubercle is present on the palatal surface of the mesiopalatal cusp. This small fifth cusp is referred to as cusp of Carabelli or Carabelli’s tubercle.

    Mandibular molars have four to five cusps. The mandibular second and third molars usually have four cusps. There are two buccal cusps (mesiobuccal and the distobuccal) and two palatal cusps (mesiopalatal and distopalatal). However, the permanent mandibular first molars usually have five cusps. The five cusps in the mandibular first molar are distributed as three buccal cusps (mesiobuccal, distobuccal, and distal) and two lingual cusps (mesiolingual and distolingual).

    Tubercles

    The tubercle is a small elevation on the crown surface produced due to the extra formation of enamel. In the posterior teeth, the tubercles are associated with marginal ridges of premolars known as an accessory marginal tubercle. In the anterior teeth, the tubercles are associated with the palatal surface of permanent maxillary permanent lateral incisors and canines.

    Cingulum

    The cingulum is a large rounded eminence on the cervical third of the Palatal or lingual surface of all deciduous and permanent anterior teeth.

    Ridge

    A ridge is a linear elevation present on any of the tooth surface.

    Marginal ridges are present on both the anterior and the posterior teeth.  Marginal ridges on the anterior teeth are found at the mesial and distal terminations of the lingual or palatal surfaces. In the posterior teeth, the Marginal ridges are found at the mesial and distal terminations of the occlusal surface. In the posterior teeth, these marginal ridges connect the buccal and the palatal or lingual cusps.

    Triangular ridges are the linear ridges that are descending from the tips of cusps of posterior teeth toward the central area of the occlusal surface.

    Transverse ridge is a union of the two triangular ridges, which transversely cross the occlusal surface on a posterior tooth to merge. These transverse ridges divide the occlusal surface into mesial and distal occlusal fossae.

    Oblique ridge crosses the occlusal surface of most maxillary molars in an oblique direction. The oblique ridge divides the occlusal surface into two prominent compartments. The most prominent oblique ridge is present on the occlusal surface of the permanent maxillary first molar. In the maxillary first molar, the oblique ridge crosses the occlusal surface from mesiopalatal cusp to the distobuccal cusp.

    Mamelons

    These are the small rounded protuberances present on the incisal ridges of the newly erupted incisor teeth. These mamelons are lost by normal physiological wear as the teeth come in contact with the teeth of the opposing dental arch.

    The presence of mamelons in an adult dentition indicates that the opposing teeth are not in contact during function (open bite).   The mamelons are present on the permanent teeth only.  In the primary incisor teeth, the mamelons are not present.

    Fossa

    The fossa is an irregular depression or concavity present on the crown of a tooth.

    Lingual or Palatal Fossa is a large, shallow fossa present on the lingual or palatal surface of anterior teeth. In some teeth such as maxillary canines, the palatal fossa is divided into two fossae due to palatal ridge into mesiopalatal and distopalatal fossae.

    Occlusal  Fossa Posterior teeth exhibit two or more fossae of varying size and shape on the occlusal surface of the tooth. The ridges further divide the occlusal fossa into smaller fossae according to their location on the occlusal surfaces. For example, on the occlusal surface of the permanent mandibular first molar, the central, mesial triangular, and distal triangular fossa are present.

    Groove

    Groove denotes the union of the primary parts of the crown of a tooth. There are fine developmental grooves present on the anterior teeth. The posterior teeth have many developmental grooves, mainly present on the occlusal surface. The central developmental groove on the center of the tooth surface running mesiodistally is the developmental groove. The accessory grooves arise from the central developmental groove.

    Pit

    The pit is a small, depressed area where developmental grooves often join or terminate. A pit is also present in the deepest portion of the fossa. Some of the names of the pits that are present on the occlusal surface of a permanent mandibular first molar are the central pit, mesial, and distal pits. In the anterior teeth, the palatal surface of the permanent maxillary lateral incisors most commonly has a pit. These landmarks (pit and fissure) are among the problematic area of the tooth to clean, and food accumulation in these areas may result in the initiation of the dental caries process.

    Dental Terminology Guide

  • The Comprehensive Dental Exam for New Patients

    The Comprehensive Dental Exam for New Patients

    Before beginning the comprehensive dental examination of a new patient. The dentist or the dental care professional (dental hygienist) should introduce him/herself to the patient and the patient attendant.  This is the initial and the most important step and should be considered as a part of the new patient dental examination protocol.

    Patient History

    In the new patient dental examination protocol, the first and the essential step is patient history. A comprehensive patient history helps in the diagnosis of dental disease and also in the subsequent management of the dental condition. A comprehensive patient history also builds a connection with the patient and that helps in the diagnosis and formulation of the best treatment plan for the patient.

    The comprehensive dental examination begins with recording the main concern of the patient or in other words the reason for attending the dental clinic. Sometimes patients have more than one presenting complains, in that case, try to establish and record the main concern of the patient. The presenting complaints of the patient ideally should be recorded in the patient’s own words.

    For a new patient dental examination, the previous dental history should also be recorded as it tells about the previous occurrence or history of the same problem, patient last dental visits and treatments performed, a pattern of dental attendance of the patient and in the past how frequently the patient has changed the general dental practitioners and the reasons of frequently changing the dental practitioners and general attitude of the patient towards the dental care.

    In a new patient dental examination protocol, the comprehensive knowledge of the patient medical history is paramount importance as it may have a major impact on the treatment planning of the patient. The patient medical history should be recorded on a dental chart either paper or computerized record before starting the dental examination of a new patient. Sometime the elderly patients and those with language barriers may need the help of an interpreter to discuss their presenting complaint and medical history. It is an important responsibility to keep the records of the patients updated including the medical history that should be updated at regular intervals before the commencement of the dental examination.  These records not only help in the management of the patient but are also helpful in forensic dentistry and forensic medicine experts in case of the mass disaster for the identification of an individual or criminal investigation.

    In the medical history, the patient should be asked about heart problems, blood pressure, bleeding disorders, history of asthma, current medications, and allergy to medicines, for example, penicillin allergy. It is also important to ask about diseases such as diabetes and epilepsy to manage these patients well in the dental practice. It is also of paramount importance to ask the patient about communicable diseases as well such as hepatitis B and C, and HIV infection. It is also important to ask the female patients of the childbearing age about pregnancy. The contact details of the patient general medical practitioner are important to confirm the medical history of the patient or for any further discussion or expert medical opinion.

    In a comprehensive dental exam, it is important to gather the patient social history. The social history of the patient includes questions that tell about the factors that influence dental disease in the past and also give some prediction about the future. The social history of the patient includes marital status, patient occupation, number of dependents, habits, smoking, and alcohol consumption.

    Comprehensive Dental Examination

    After the history, the next step is the clinical dental examination. Before starting dental examination always reassure the patient especially the children and the anxious patients.  The comprehensive dental examination is divided into two components extraoral examination and intraoral examination. The extraoral examination includes the patient’s general appearance of the patient, swelling in the head and neck region, lip competency, the examination of the temporomandibular joint, an examination of the muscle of mastication, and palpation of lymph nodes.

    The intraoral examination is performed using the basic intraoral examination instruments that comprise of mouth mirror, explorer, and tweezer.  Begin the intraoral examination with the area of the presenting complaint as this makes the patient more comfortable with the dental professional and increases the patient confidence. After carefully examining the area of presenting complain of the patient examine the other areas of the oral cavity systematically. For example, observe the condition of the soft tissues like gingiva, buccal, lingual, and labial sulci, the floor of the mouth, palate, and retromolar areas. Record the presence of any abnormal appearance, swelling, or sinuses.  For the dentition record the number of teeth present, missing, and unerupted teeth. Also, record the general state of the dentition and oral hygiene status. Teeth that are restored and those with caries should also be recorded.  In the case of dentures, their age and condition and soft tissues under the dentures should be examined and recorded. Tooth surface loss other than caries for example due to erosion, attrition, and abrasion should be recorded. The periodontal condition should also be recorded. A brief evaluation of occlusion should be performed at this step and it includes, the path of mandibular closure, any premature contacts, over erupted teeth, intercuspal relationship, overjet, and overbite.

    DIAGNOSIS

    After history and a comprehensive dental examination, a provisional diagnosis is made. However, this provisional diagnosis can only be confirmed after some special tests and investigations. The investigations in the dental clinical settings usually include dental radiographs, photographs, pulp vitality testing (chemical or thermal stimuli), study models for the analysis of occlusion, histological examination, and blood tests. For a single patient, either one of these or multiple investigations is performed.

    From the patient history examination and investigations, a definitive diagnosis will be reached. The definitive diagnosis should be recorded in the patient chart. In patients with multiple dental complaints, there may be more than one definitive diagnosis, for example, dental caries and periodontal disease.

    Treatment Planning and Patient Management

    The treatment planning should focus initially on relieving the patient presenting complain that is usually pain.  After providing emergency treatment the next step is the preventive advice as this is important to prevent any future dental disease.  Necessary periodontal treatment and treatment of carious teeth other than the main complaint should be done. In the later stages, more advanced treatment procedures can be performed such as endodontics, crowns, bridges, partial dentures, and dental implants.

    When the treatment is complete it is important to emphasize recall visits. The frequency of the recall visits is dependent on the future dental disease risk status determined by the dentist.

    It is usually asked how long does a dental exam take. The average time it takes for a dental care professional to perform a comprehensive dental examination on a patient is about 30 to 45 minutes.

    However, it may take longer than usual in several circumstances like severe or complex dental problems, type of dental practice especially when the dental examination is performed by the student at a teaching site, and welfare sites where patients are treated in large numbers free of cost or on subsided rates.

    Factors that affect treatment planning

    Numerous factors can affect the treatment planning and these factors should be considered while performing a comprehensive dental examination. Some of the key factors that affect treatment planning are:

    Multiple underlying medical conditions.

    • Highly anxious and non-cooperative patients.
    • Patients who are unable to maintain oral hygiene.
    • Patients who are unable to adhere to the treatment and follow up appointments.
    • In areas where there is limited availability of the dentists, dental care professionals, and specialists.

    Treatment planning is also dependent on patient affordability. Even when the dental treatment payments are made by the third party. There are sometimes limited treatment procedures that are covered.

  • Structure of Human teeth and their Functions

    Structure of Human teeth and their Functions

    Introduction

    Humans have two sets of dentition the deciduous dentition and the permanent dentition. The complete deciduous dentition comprises of 20 teeth and the permanent dentition comprises of 32 teeth.

    Parts of Human Tooth

    Each tooth is comprised of two parts the crown and the root.

    1. Crown: It is the portion of the tooth covered by enamel. The crown of anterior teeth has an incisal ridge while the posterior teeth have an occlusal surface having cusps.
    2. Root: The root is embedded inside the alveolar socket and is covered by cementum. Anterior teeth usually have a single root while the posterior teeth have one root (maxillary second premolar, mandibular first premolar, and second premolar), two roots (maxillary first premolar, mandibular molars) or three roots (maxillary molars).

         Parts of Human Tooth

    Tissues of Human Tooth

    Human tooth comprises of the following four tissues

    1. Enamel
    2. Dentin
    3. Cementum
    4. Dental Pulp

    The first three tissues are the hard tissues or mineralized tissues of the tooth. while the dental pulp is the soft tissue. The following sections briefly describe each of these tissues of the tooth.

    Structure of Human tooth (A= Enamel, B= Dentin C=Pulp, and D= Cementum)

     Enamel

    Enamel covers the crown portion of the human tooth. Enamel is the hardest tissue of the human body. It is derived from the ectoderm.  The enamel thickness varies for example near the incisal edge and the cusp tips the thickness of the enamel is more as compared to enamel thickness near the cementoenamel junction (CEJ). The enamel structure comprises of highly ordered structure in form of rods and inter rods.

    The Enamel forming cells are known as ameloblasts and the ameloblasts they reduce in size when the enamel formation is complete and are lost when the tooth emerges into the oral cavity. Therefore, enamel lacks regenerative potential. However, remineralization of the very small demineralization lesions occurs with the help of saliva and toothpaste that are rich in fluoride and calcium.

    Dentin

    The hard tissue that forms the bulk of the tooth is dentin. The color of dentin is yellowish-white, and it is avascular hard tissue. The dentine is composed of apatite crystals and the organic component is collagen. It is resilient tissue and it supports and prevents fracture of the overlying enamel.

    The cells that form dentin are known as odontoblasts and these cells originate from the ectomesenchyme. The structure of dentin comprises of dentinal tubules that transverse the dentin thickness. These dentinal tubules contain the odontoblast cells process.  The odontoblasts they continue their function of dentin formation throughout life. After root formation is complete the dentin formation it continues at a slower pace. The dentin has regenerative potential as the formative cells deposit new dentin in response to a stimulus. In addition to that, the dental pulp has stem cells that can differentiate into odontoblast like cells and deposit the dentin matrix.

     Cementum

    Cementum is a mineralized tissue that covers the root surface of the tooth and covers the root dentin. The cementum and the root dentin are firmly interlocked with each other and form the cementodentinal junction. Another junction that is formed by the union of enamel and cementum at the neck of the tooth is a cementoenamel junction (CEJ) or cervical line.

    Cementum has some similarities with the bone the main difference is that cementum is an avascular tissue.  The formative cells of the cementum are called cementoblasts. The cementoblasts are differentiated from the dental follicular cells. During cementum formation the cells of the cementum they become entrapped into the cementum matrix and are called cementocytes. Natural repair and regeneration are possible in cementum.   The cementum matrix anchors the periodontal ligament fibers (PDL) and those PDL fibers on the other end are inserted into bone or the gingiva. A fibrous joint is formed as a result known as gomphosis.

    Cementum is the main component of the periodontium (supporting tissues of the tooth) other components of periodontium are periodontal ligaments, gingiva, and the alveolar bone.

    Components of periodontium (A= Cementum, B= Gingiva, C= Periodontal ligaments and, D= Alveolar bone)

    Table: Summary of the hard tissues of the Human tooth

      Enamel Dentine Cementum
    Composition 96%mineral comprises of hydroxyapatite, 3%organic material comprises of enamel proteins amelogenins and non-amelogenins enamelinsand tuftelins and 1%water 70% mineral comprises of hydroxyapatite, 20% organic component mainly type I collagen, glycosaminoglycansand phosphoproteins and 10% Water 50% inorganic component,35% organic material and12% of water
    Formative cells Ameloblasts Odontoblasts Cementoblasts
    Formative cells life span Reduce in size and lost when a tooth emerges into the oral cavity For the life of human tooth Most likely for the life of human tooth
    Regeneration No Yes Yes
    Degradative or Resorptive cells Not known Odontoclasts Cementoclasts and Odontoclasts
           

    Dental Pulp

    The dental pulp is the soft connective tissue present in the center of the tooth surrounded by dentin. The cavity in which dental pulp is present is called the pulp cavity. The pulp cavity consists of two components pulp chamber and the root canal.  The dental pulp comprises a mass of connective tissue cells, collagen fibers (mainly type 1 collagen), blood vessels, nerves, and lymphatics. The pulp cavity communicates with the exterior of the tooth at the root apex through the apical foramen. The nerve and blood vessels enter and leave the tooth at the apical foramen.  The size of the pulp chamber and the pulp canal reduces with age because of the deposition of dentin.

    The dental pulp has a rich blood supply and provides nutrition to the avascular dentin. The pulp and dentin are interrelated with each other as they originate from the same ectomesenchymal cells and therefore referred to as dentin pulp complex.

    The dental pulp performs the following important functions that help in maintaining the vitality and the function of a human tooth.

    1. Formative: The dental pulp constitutes of numerous cells. The most prominent cells among those are the odontoblasts. The cell body of the odontoblasts is inside the dental pulp and cell processes are within the dentin inside the dentinal tubules. These cells are capable of the formation of dentin throughout life.
    2. Nutritive: dentin is an avascular tissue and the dental pulp has a rich blood supply that provides nourishment to the dentin and the dentin forming cells.  
    3. Protective: The dental pulp contains unmyelinated and myelinated nerves that form a network of nerves called Raschkow’s plexus present below the odontoblasts and it helps in dentin sensitivity.
    4. Reparative: dental pulp helps in the formation of new dentin in response to noxious stimuli to protect the vitality of the tooth. This reparative function is performed either by the same odontoblasts that form the rest of the dentin or by the newly differentiated odontoblast like cells.

    The tissues of the tooth (enamel, dentin, and cementum) they are hard and resilient tissues and are capable to withstand the destructive processes. Therefore, these tissues are used by forensic science experts for identification purposes.

    Functions of Human Tooth

    The human teeth perform the following functions.

    1. Mastication: when the food enters into the oral cavity the process of digestion begins. The saliva helps in the initial chemical digestion of food. The mechanical digestion also starts in the oral cavity as the teeth grind the food into small particles. This process is known as mastication. The human dentition has three-tooth forms incisiform teeth (central and lateral incisors), caniniform teeth (canines), and molariform teeth (premolars and molars). Each of these tooth families performs their function, for example, incisiform teeth perform cutting function, caniniform teeth perform the tearing function, and molariform teeth perform the grinding function.   
    2. Phonetics: Teeth together with the tongue is important for proper pronunciation of words.
    3. Esthetics: Teeth maintain the position of the facial muscles and prevent sinking in of the facial muscles. Additionally, teeth together with the alveolar bone maintain the lower facial height.
    4. Space maintainer: Teeth prevent the over eruption or abnormal migration of the adjacent or the opposing teeth.
    5. Defense: The animals use their teeth as a weapon of attack and defense. However, human rarely uses their teeth for attack or defense purpose. 

    Structure of Human Tooth

  • Teeth Names and Numbering Systems: You need to know

    Teeth Names and Numbering Systems: You need to know

    Before starting the tooth numbering it is important to give a brief overview of the human dentition. Humans have two sets of dentitions one is called Primary dentition and the second and the final set is called secondary dentition.

     Primary Dentition

    The primary dentition is also known as deciduous dentition, milk teeth, temporary teeth, or baby teeth. The first primary tooth erupts at the age of 8 months and the deciduous dentition is completed by the age of 3 years. In the complete primary dentition, there are twenty teeth. Ten teeth in the upper arch (Maxillary jaw) and ten teeth in the lower arch. (Mandibular jaw)

    The teeth are divided into anterior teeth and posterior teeth. The anterior teeth in the deciduous dentition include maxillary and mandibular central incisors, lateral incisors, and canines. The posterior teeth are maxillary and mandibular first and second molars.

    The details and names of the primary teeth are in the figure and table below.

    The human complete primary dentition

    Table 1: Names of Primary teeth with the age of eruption and Exfoliation

    Name of Primary Teeth Age of Emergence (eruption age) Age of Exfoliation (shedding of teeth)
    Maxillary or Upper arch    

    Central Incisors

    10 months 6-7 years

    Lateral Incisors

    11 months 7-8 years

    Canines

    19 months 10-11 years

    First molars

    16 months 9-10 years

    Second molars

    29 months 10-11 years
       

    Mandibular or Lower Arch    

    Central Incisors

    8 months 5-6 years

    Lateral Incisors

    13 months 6-7 year

    Canines

    20 months 8-9 years

    First molars

    16 months 9-10 years

    Second molars

    27 months 10-11 years

    Permanent Dentition

    The permanent dentition is also known as secondary dentition. The first permanent tooth erupts at the age of six years and eruption of permanent dentition is completed by the age of twenty-one years. In the case of congenitally missing third molars, the permanent dentition is completed by the age of thirteen years.    From the six years until eleven years the deciduous teeth are also present in the oral cavity and this period is known as transitional or mixed dentition period.

    The details and names of the permanent teeth are in the figure and table below.


     The human complete permanent dentition

     Table 2: Names of Permanent teeth with the age of eruption.

    Name of Permanent Teeth Age of Emergence (eruption age)
    Maxillary or Upper arch  

    Central Incisors

    7-8 years

    Lateral Incisors

    8-9 years

    Canines

    11-12 years

    First Premolars

    10-11 years

    Second Premolars

    10-12 years

    First Molars

    6-7 years

    Second molars

    12-13 years

    Third Molars

    17-21 years s

    Lateral Incisors

     
    Mandibular or Lower Arch  

    Central Incisors

    6-7 years

    Lateral Incisors

    7-8 years

    Canines

    9-10 years

    First Premolars

    10-12 years

    Second Premolars

    11-12 years

    First molars

    6-7 years

    Second molars

    11-13 years

    Third molars

    17-21 years


    Tooth Types or Families

    In both the deciduous and permanent dentitions there are three tooth forms or families and those are:

    Incisiform teeth

    The incisiform teeth are central and lateral incisors their main function is cutting as the incisal ridges have are blade-like structure.

    Caniniform teeth

    The canini form teeth are the canines. The main function of canine is tearing and piercing of food.

    Molariform teeth

    The molariform teeth are molars and premolars (premolars only present in permanent dentition). These teeth have grinding functions as these teeth have a wide occlusal surface and they possess cusps.

    Introduction to Tooth Numbering Systems

    Several tooth numbering systems are in use around the world for the recording of data in dental practice and dental research.  The three most popular tooth numbering systems are:

    1. The universal tooth numbering system
    2. Palmer tooth numbering system
    3. FDI tooth numbering system

    These tooth notation systems serve as an abbreviation that makes the recording of data and communication convenient.

    The universal tooth numbering system

     The American dental association (ADA) recommends the universal numbering system. This tooth notation system is also known as the American tooth numbering system. In this notation system, every tooth has a unique alphabet or a number and there is no need to use any symbols as in some other numbering systems (Palmer tooth numbering system).

    Deciduous dentition

    The Universal system for tooth notation uppercase alphabets is used for deciduous teeth. The tooth notation in the universal system in deciduous teeth begins from the right maxillary second molar with alphabet A and the last alphabet in the maxillary arch is J for the left maxillary second molar.  In the mandibular deciduous teeth, the universal notation begins with alphabet K for the mandibular left second molar and ends with letter T for the right mandibular second deciduous molar. The universal tooth notation system for entire deciduous dentition is presented in the following picture.

    A universal tooth notation system for primary teeth

    Permanent dentition

    In the universal notation system for permanent dentition, the teeth are numbered. The numbers begin with 1 for the right maxillary third molar and in the maxillary arch end on 16 for the left maxillary third molar. In the mandibular arch, the numbers begin with 17 for the left mandibular third molar and end on number 32 for the right mandibular third molar.

    The following picture designates the universal tooth notation system for entire permanent dentition.

    The universal tooth numbering system for permanent teeth


    Palmer tooth numbering system

    The palmer tooth notation system was first introduced by Adolf Zsigmondy for the permanent dentition and later modified for deciduous dentition. The system is widely known as the Palmer notation system and less commonly as the Palmer Zsigmondy notation system. This notation system uses symbols to designate the quadrants with the alphabets (deciduous teeth) or numbers (permanent teeth) to designate a particular tooth.

    Deciduous dentition

    In this notation system the maxillary and the mandibular arches are divided into the quadrants the central incisors are represented by A through E for the second deciduous molar. In this notation system, the important thing is the symbol that is used together with the upper case alphabet, and that symbol indicates the arch (Maxillary or mandibular) and the quadrant (right or left). The Palmer tooth notation system (together with symbols use to designate arch and quadrant) is presented for entire deciduous dentition in the following picture.


    Palmer tooth notation system for deciduous teeth (observe the symbols used)

    Permanent dentition

    The palmer notation system for the permanent dentition the arches are also divided into quadrants represented by symbols. In the palmer notation system for the permanent teeth, the teeth are represented by a number instead of alphabets that were in use in deciduous dentition. 

    The Palmer numbering system in each quadrant begins with 1 for the central incisor to 8 for the third molar. The symbols that are used along with these numbers indicate the arch and the quadrant where the tooth is present.

    The following picture explains the palmer tooth notation system for the entire permanent teeth.

    Palmer tooth notation system for permanent teeth (observe the symbols used)


    FDI tooth numbering system

     The Fédération Dentaire Internationale (FDI) proposed a two-digit tooth numbering system known as an FDI tooth numbering system. This tooth numbering system is adopted by the major organizations around the world such as the World Health Organization (WHO) and the International association for dental research (IADR).

    Deciduous dentition

    The first digit in this numbering system indicates quadrant and the second digit indicates the tooth number, for example, the deciduous maxillary right central incisor is designated as 51. The first number that is 5 indicates the maxillary right upper quadrant and 1 indicates central incisor. In this numbering system, the correct pronunciation is five-one, not fifty-one. The FDI tooth numbering system for entire deciduous teeth is presented in the following picture.


    FDI tooth numbering system for primary teeth

    Permanent dentition

    Similar to the deciduous dentition in the permanent dentition there are two digits the first indicates the quadrant and the second digit indicates the tooth. For example, the permanent right maxillary central incisor in the FDI numbering system is indicated as 11 (one-one not eleven). The first 1 indicates the right maxillary quadrant and the second 1 indicates the tooth number. The FDI tooth notation system for the entire permanent teeth is presented in the following picture.


     FDI tooth numbering system for permanent dentition

    FDI Tooth Notation System

    Palmer tooth Notation System

    Universal tooth Notation System

  • What is Dry Socket: A Comprehensive Exploration

    What is Dry Socket: A Comprehensive Exploration

    Dry socket is one of the complications that occur after tooth extraction. A dry socket in the literature is also known as ‘fibrinolytic alveolitis’ or ‘focal alveolar osteitis’ there is delayed healing in the dry socket due to the fibrinolytic activity within the tooth extraction socket. This fibrinolytic activity results in intense pain and exposure of the alveolar bone due to the non-healing of the socket.

    Signs and Symptoms of Dry Socket

    The following signs and symptoms are indicative that the patient is suffering from a dry socket.

    • In a dry socket, the postsurgical pain increases on the third to the fifth day after tooth removal.
    • The pain intensity in a dry socket is moderate to severe that has throbbing nature and pain is not relieved by the medications (analgesics and antibiotics).
    • The pain of the dry socket is localized but occasionally pain radiates to the auricular region. There is no swelling or signs of infection such as swelling, fever, and redness.
    • There is some degree of trismus but it is usually a result of surgical trauma during dental extraction and not as a result of dry socket.
    • The intra-oral clinical examination demonstrates that the extraction socket is empty with complete or partial loss of blood clot. The bone of the alveolar socket is sometimes partially visible because of the loss of blood clot.
    • The area of the tooth extraction socket has a bad smell filled with debris and the patient also complains about bad taste.

     Associated Risk factors for Dry Socket

    The cause of alveolar osteitis or dry socket is not fully understood. The dry socket occurs in 1-3% of all dental extractions. The incidence of dry socket is associated with several local and systemic factors such as

    • Tooth extraction during active infection.
    • Extraction of the mandibular teeth especially mandibular molars.
    • Wisdom tooth extraction especially mandibular third molars that are surgically extracted.
    • History of traumatic extraction in which there is the removal of bone and trauma to soft tissues.
    • Cancer patients who have undergone radiotherapy recently.
    • Female patients currently on oral contraceptives.
    • Tobacco consumers who are using any form of tobacco like cigarettes, smokeless tobacco, and Electronic cigarettes.
    • History of soft tissue inflammation around partially erupted or impacted wisdom teeth.
    • History vigorous rinsing post-extraction or not followed post-extraction instructions properly.
    • Poor oral hygiene maintenance.
    • Active Periodontal diseases such as periodontitis or acute necrotizing ulcerative gingivitis.
    • Local bone diseases or sclerosis such as Paget’s disease, cemento-osseous dysplasia, and osteopetrosis which reduces the blood supply required for the formation of a blood clot.
    • Excessive use of local anesthesia the vasoconstrictor in the local anesthesia prevents the formation of a blood clot.
    • Patients with a previous history of dry socket are also at high risk of developing dry socket after tooth extraction in the future.

    Dry socket is usually diagnosed with a history of pain and clinical examination only and usually, no investigations such as x-rays are required unless retained root fragments or fracture of the alveolar bone is suspected. 

    Treatment of Dry Socket

    The management of the patient presenting with the dry socket is straight forward and consists of the following steps. The home remedies for dry socket treatment should be avoided and the patient should consult the operating dentist or any qualified dental practitioner for management of dry socket.  

    1. Reassure the patient that this is not a serious condition or complication of tooth extraction and the pain is not due to the extraction of the wrong tooth or due to remnants or roots of a tooth. The pain and the resulting discomfort will subside within a few hours and the socket will completely heal in the next few weeks.
    2. Irrigate the extraction socket under gentle pressure with the help of a sterile syringe under local anesthesia. The best choice for irrigation is sterile normal saline or with a chlorohexidine solution (0.12%). The excessive irrigation solution should be removed with gentle suction.
    3. The extraction socket should not be curetted as it will further escalate the pain and will cause discomfort to the patient. Gently remove the debris that is not removed after the irrigation of the socket.
    4. After removal of excess irrigation solution and removal of debris, the medicated dressing should be placed but not pushed inside the socket as packing of the socket with medicated dressing may further delay the healing process.
    5. The medicated dressings placed as part of the treatment of dry socket usually consists of the following ingredients: Eugenol, topical anesthetic such as benzocaine and a carrying vehicle. The medicated dressings are commercially available with different brand names such as Alvogyl. The patient usually feels better within ten minutes after the placement of the medicated dressing.
    6. The majority of the patients feel pain relief only with one dressing and very few of them require multiple follow up appointments and dressings. The frequent changing of medicated dressings may also delay healing of the extraction socket and therefore unnecessary follow-up appointments must be avoided.  The tooth extraction site will heal normally but slower than usual within a week.
    7. Antibiotics are not suggested as part of the management of dry socket. However, the non-steroidal anti-inflammatory drugs (analgesics) can be prescribed but with the local measures that are described earlier.

    Prevention of Dry Socket

    The incidence or likelihood of dry socket can be minimized by adhering to the following general guidelines. 

    1. Use of surgical techniques that cause minimal trauma to the tissues such as atraumatic dental surgery with clean soft tissue incisions.
    2. The optimal level of sterilization of the dental instruments and the implementation of strict infection control measures during dental extraction.
    3. Ask the patient to rinse the oral cavity with Chlorhexidine or another oral antiseptic agent before dental extraction.
    4. Strict adherence to the post-extraction instructions or guidelines.
    5. Maintaining proper oral hygiene.
    6. Abstaining from smoking and any form of tobacco.

    If the pain of dry socket fails to resolve after several follow up appointments. It may indicative of some other conditions that are needed to be addressed such as small bone sequestra that are left after tooth extraction, retained tooth or root fragments, osteomyelitis, pre-existing pathology in the adjacent tooth, surgical trauma or damage to the adjacent tooth during dental extraction, dislocation of the mandible, fractured bone and osteonecrosis.  

  • Human Dental Formula: An Easy Guide for Students

    Human Dental Formula: An Easy Guide for Students

    The type and number of teeth in the human dentition is expressed using a formula called human dental formula. In the dental formula, the alphabet and numbers are used to designate the type and number of teeth present in the dentition. The same method of expressing the type and number of teeth is also used to describe the dental formula of species (sheep, horse, cat, and dog) other than humans.

    The humans have two sets of dentition deciduous dentition and permanent dentition with different numbers and types of teeth. Therefore, dental formulae are different for children and adults.

    The dental formula of the child

    The dental formula of a child is
    The type of teeth is designated by the alphabet and the quantity in each side of the upper and lower jaw is designated by a number.

    I= Incisors both central and lateral in the maxillary and the mandibular arches and 2= quantity of teeth in the maxillary and mandibular right quadrants

    C= Canine teeth both in the maxillary and mandibular arch and 1= quantity of maxillary canine in maxillary and mandibular right quadrants

    M= deciduous first and second maxillary and mandibular molars and 2= number of teeth each in the maxillary and mandibular right quadrants. There are no premolars in the deciduous dentition.

    If this dental formula is multiplied by two it gives the total number of teeth in the entire deciduous dentition that is twenty teeth.

    The following picture also describes how the dental formula is written.

    The dental formula of complete deciduous dentition

     Adult dental formula

    The adult dental formula is

    Like the deciduous dental formula, the type of teeth is designated by an alphabet and the quantity in each side of the upper and lower jaw is designated by a number.

    I= Incisors both central and lateral in the maxillary and the mandibular arches. 2= quantity of teeth in the maxillary and mandibular right quadrants.

    C= Canine teeth both in the maxillary and mandibular arch and 1= quantity of maxillary canine in maxillary and mandibular right quadrants only.

    PM= Premolars both in the maxillary and mandibular dental arches and 2= quantity of premolars in maxillary and mandibular right quadrants only.

    M= Molars maxillary and mandibular (first, second, and third molars) 3= quantity of molars in maxillary and mandibular right quadrants only.

    The dental formula is multiplied by two it gives the total number of teeth that are present in the entire permanent dentition that is 32 teeth.

    The following picture also describes how the adult dental formula is written.


     The dental formula of adult complete permanent dentition

    The dental formula (Dental formula of child and adult dental formula) indicates that humans are omnivores (eat a variety of diet both of plant and animal origin). The canines are poorly developed as compared to pure carnivore animals such as cats and dogs. The dental formula also indicates that humans have a heterodont dentition (teeth in the dental arches are of different shapes or types).

    It should be kept into consideration that animals other than humans may have different dental formulae.  In a few cases, humans have the same dental formula as some of the ancient species of monkeys and apes but the human teeth are much smaller in size as compared to these species.

    Video#01

    Video#02

  • How to Draw Teeth: A Comprehensive Guide with Media Aid

    How to Draw Teeth: A Comprehensive Guide with Media Aid

    The understanding of the detailed dental morphology or dental anatomy of both anterior and posterior teeth is important for the restoration of form, function, and esthetics of lost or damaged teeth. Students and some of the faculty (yes sometimes!) found this exercise boring or of no practical relevance. But believe me, drawing of teeth is an important exercise! Let me give you an example: An individual cannot solve complex mathematical equations or questions without knowing basic mathematics (addition, subtraction, and multiplications).

    The same applies to dental anatomy exercises like tooth drawing and tooth carving. Usually, tooth drawing exercises are in the preclinical years and it gives the students a foundation that helps them to apply this anatomical knowledge in clinical years and ahead in the dental profession in which they have to design restorations that should be esthetically pleasing and functionally resemble the lost or missing structure of a tooth.

    This exercise is not only useful for dental students who will be doing mostly direct restorations but also useful for dental technicians and dental technologists who are preparing indirect restorations. Due to the positive outcomes of tooth drawing exercise on a graph or sometimes plain papers it has been incorporated into the dental curriculums of the US, UK and some of the dental and dental hygiene schools of the Middle East and Asia.

    Requirements for Tooth Drawing Exercise

    The following are armamentarium or material that are required for tooth drawing.

    1. Artificial teeth made of plastic or ceramic (designed by various companies like KaVo, Nissin and Frasaco) or Plaster teeth.
    2. Pictures of natural teeth from all aspects along with the tooth dimension chart present in dental anatomy textbooks (Wheeler’s Dental Anatomy, Physiology, and Occlusion).
    3. Graph paper.
    4. Stationary (Sharpe pencil, Eraser, Scale).

    Basic Tips and Procedure for Drawing of Teeth

    The Following set of instructions or suggestions will be helpful in tooth drawing exercises.

    1. Use sharp pencils for drawing of teeth as pencil drawings are easier to correct and there is no need to redraw completely.
    2. Initially draw some freehand drawings of tooth outline (for practice).
    3. The Stepwise drawing is helpful (drawing of the crown and then root using boxes of graph paper) especially useful for learners with different levels of drawing skills.
    4. Draw oversized teeth (without disturbing the proportions of the tooth). Using the following scale: 2 small boxes equals to 1mm (7mm, equal 14 Small boxes on the graph) or follow your tutor instructions for drawing size.
    5. Help your friends if they ask for it, do not completely draw or give your tooth drawings to colleagues. Demonstrate and share your learning with them it will enhance your drawing skills.
    6. Drawing a perfect tooth depends on your theoretical knowledge as well. Therefore, try to go through all the possible resources (both in text and video formats) before start drawing a tooth.
    7. Practice and Practice. The more you practice a skill you will be perfect in it.
    8. The learner may use the following Rubric to self asses their drawings and this may help in further improvement in their drawings.

    Tooth Drawing Assessment Rubric

    The following rubric may help the students in self-assessment of their tooth drawing

    No.Tooth Drawing Rubric  Criteria 12345
           
    1.

    Outline of the Tooth crown

    (curvatures, inclination, proportions, neatness, and presentation)

         
    2.

    Outline of the Tooth root

    (curvatures, inclination, proportions, neatness, and presentation)

         
    3.

    Major anatomical details – Crown

    (Marginal ridges, Cuspal ridges, fossa)

         
    4.

    Major Anatomical details – Root

    (developmental depressions, cervical line curvatures)

         
    5.

    Minor Anatomical details – Crown

    (Grooves, developmental depressions)

         
    6.

    Minor Anatomical details – Root

    (Grooves, developmental depressions, cervical line curvatures)

         
    7.Drawing according to measurements scale     
    8.Labeling of the anatomical landmarks of tooth     

    Scoring

    Acceptable (30-40)

    Acceptable but need improvement (19-29)

    A dire need for Improvement or Need to redraw (8-18)

    Basic of Tooth Drawing/ How to a Draw Tooth?

    Tooth Drawing on Graph Paper
  • Surfaces of the Teeth: A review of Dental Anatomy

    Surfaces of the Teeth: A review of Dental Anatomy

    The understanding and correct use of basic dental terminologies are crucial not only in the initial academic years but also in clinical practice, dental laboratory settings, and research. There are mainly five surfaces of the teeth.


    The five surfaces are labial, palatal, mesial, distal and incisal surfaces. For example, in posterior teeth, mandibular molar, the five surfaces are buccal, occlusal, lingual, mesial, and distal surfaces. The names are given to these surfaces according to their position and use.


    Following is a brief description of this topic. The blog will cover all aspects you want to read. It includes but is not limited to the explanation of all surfaces. A video and images are also part of it for better understanding.

    Types: Surfaces of the Teeth

    Labial Surface

    The surface of the tooth that is towards or adjacent to the lips. The term labial surface is usually used for surfaces of incisors and canines that are present just adjacent to the lips.


    Clinical picture showing the labial surfaces

     Buccal Surface

    The tooth’s surface is towards or adjacent to the mucosa of the cheek. The term buccal surface is designated for the surfaces of premolars and molars that are immediately adjacent to the cheek.

     Clinical picture

    Facial Surfaces

    The labial and the buccal surfaces are collectively referred to as facial surfaces of teeth.  


    Plaster model showing the facial surfaces (Labial + Buccal surfaces = Facial surfaces)

    Palatal Surface

    The surface that is towards or adjacent to the palate is the palatal surface. The term palatal surface is used for surfaces of maxillary teeth (both anterior and posterior teeth) that are towards or adjacent to the palate.


     Clinical picture (Red arrows= Palatal surfaces)

     Lingual Surface

    The surface of the tooth that is towards or adjacent to the tongue. The term lingual surface is used for the surface of a mandibular tooth (anterior or posterior) that is present immediately adjacent to the tongue.   

    Clinical picture showing lingual and occlusal surfaces (Red arrows=Lingual surfaces)

    Mesial Surface

    The surface of the tooth towards or near the midline is the mesial surface. The only teeth that share their mesial surfaces are the maxillary and the mandibular central incisors.

    Distal Surface

    The surface of the tooth that is away from the midline is the distal surface.


    Clinical picture showing mesial and distal surfaces of the central incisor (Green arrow= Mesial , and Orange arrow=Distal surface)

    Proximal Surface

    The mesial and distal surfaces are collectively called proximal surfaces. In other words, the proximal surface means either the mesial or the distal surface.

    Incisal Surface

    The cutting surfaces of anterior teeth (both upper and lower anterior teeth) are known as incisal surfaces.

    Clinical picture showing incisal surface (Pink arrow= Incisal surface)

    Occlusal Surface

    The biting or grinding surfaces of posterior teeth (premolars and molars) are referred to as occlusal surfaces.

    Clinical picture showing lingual and occlusal surfaces (Black arrows= Occlusal surfaces)

    Tooth SurfaceDescription
    Labial SurfaceSurface of the tooth towards the lips
    Buccal SurfaceSurface of the tooth towards the buccal mucosa
    Facial SurfaceLabial and buccal surfaces collectively called facial surfaces
    Palatal SurfaceSurface of the tooth towards the palate
    Lingual SurfaceSurface of the tooth towards the tongue
    Mesial SurfaceSurface of tooth towards the midline
    Distal SurfaceSurface of tooth away from midline
    Proximal SurfaceMesial and distal surface collectively called proximal surface
    Incisal SurfaceCutting surface of anterior teeth
    Occlusal SurfaceGrinding surface of posterior teeth
    Table: Tooth surfaces chart for rapid review

    Surfaces of Teeth | Video Explanation

  • Tooth Extraction Aftercare: An Ultimate Guide

    Tooth Extraction Aftercare: An Ultimate Guide

    Exodontia or Tooth extraction

    The tooth extraction or exodontia refers to the removal of tooth or tooth roots with minimum pain, discomfort and trauma to the patient.

    The tooth extraction or exodontia is performed because of one of the following reasons.

    • Grossly decade or infected tooth because of dental caries
    • Pulpitis (Inflammation of the dental pulp)
    • Periapical inflammation of the periodontal tissues
    • Abscess because of periapical inflammation and pericoronitis (inflammation of soft tissues around partially erupted tooth)
    • Cracked or Fractured tooth
    • Tooth associated with numerous pathologies such as tumors, cysts, and fracture of bones of the jaw
    • Grossly displaced, Impacted tooth and supernumerary tooth
    • Part of the orthodontic treatment plan
    • Retained deciduous tooth

    Post Extraction care

    The post tooth extraction care instructions add less than ten minutes to the patient appointment time but these instructions are of paramount importance as these tooth extraction aftercare instructions minimize the negative sequelae of tooth extraction and resulting patient discomfort. These post-extraction instructions also reduce the overhead costs that are associated with the removal of a tooth.

    The following are the evidence-based guidelines for post tooth extraction care of the extraction site. These post-extraction instructions not only apply to the normally extracted tooth but the same also applies to surgical extractions including wisdom tooth extractions.

     Following these guidelines as mentioned reduce the post-extraction costs but also fasten the healing process after tooth removal.

    Haemorrhage Control

    Bite firmly on moistened gauze placed on the tooth extraction site. The gauze is placed to control the bleeding from the tooth extraction site. Bite firmly on the gauze pack for at least 20 to 25 minutes and avoid chewing the gauze or opening the mouth.

    It is normal for the tooth extraction site to ooze slightly up to 24 hours after tooth removal.

    Spitting and Rinsing

    Avoid rinsing with water or any other medicated solution or spitting saliva for 24 hours post-extraction as it may dislodge the newly formed clot and trigger bleeding from the extraction site.

    After twenty-four hours rinse the mouth with a glass of warm saline water for a three to four times a day for a week.

    Food and Drinks

    Do not eat any food immediately after tooth removal as the tooth extraction area is under the effect of local anesthesia and there is a chance of injury to oral soft tissues. Avoid hot food, fluids, carbonated drinks, and hard food. Instead, choose a cool, soft and liquid diet with high calorie and fluids. The soft diet keeps the tooth extraction area comfortable by preventing trauma and bleeding from the tooth extraction site and hasten the healing process.

    For two to three days after tooth removal chew the food from the opposite side of the dental arch.  The patient should be advised to avoid using a straw while drinking as this creates negative intraoral pressure that may dislodge the newly form clot and results in bleeding from the tooth extraction site.

    Smoking

    Those who smoke should avoid smoking for at least 24 hours post-extraction. As tobacco smoke and nicotine interfere with the formation of clots and delay the process of wound healing at the tooth extraction site.

    Medications

    To avoid pain and discomfort after tooth removal take the medicines as prescribed and do not modify the drug dose, add other drugs or stop using the medication. Do not locally apply any medication at the tooth extraction site for pain relief or rapid healing as it may cause harm to the soft tissues.

    The initial or first dose of medication short be taken earlier post-extraction this prevents discomfort before the effect of local anesthesia disappears. These medications are for the relief of the post-extraction pain but also reduces inflammation and swelling.

    Oral Hygiene Maintenance

    As part of post-extraction care, the mouth should be kept clean as possible as this reduces the microbial load, reduces food particles and dead cells and helps in healing of the tooth extraction site. After tooth extraction, the brushing of the teeth that are away from the tooth extraction site can be performed as usual. Brushing of teeth adjacent to the tooth extraction site should be avoided after tooth extraction to prevent pain and bleeding from the tooth extraction site. Resume the normal tooth brushing routine, use of floss and mouthwash 2 to 3 days post-extraction.

    After 24 hours of tooth extraction gently rinse the mouth with a warm saline rinse or any other rinse recommended by the doctor. The water should be warm and not hot to prevent burn or damage to the tissues. Rinse the oral cavity with the warm saline for at least three times a day especially after meals for one week.

    Rest

    The strenuous exercise or work should be avoided for 12 hours post-extraction because strenuous work or exercise may result in increased bleeding from the extraction site. Keep your head in a slightly upright position on the pillow.  

    Post extraction follow up

    The patient should visit the dentist within 1 week or as advised after tooth extraction to check the progress of the healing of the tooth socket. Besides, if the sutures were placed after tooth extraction they will be removed from the tooth extraction site during this follow up appointment.    

    It is advisable to give the patients written post-extraction care instructions in addition to the verbal instructions.  These written post tooth extraction instructions should also contain the operating dentist or dental practice telephone number and email address. So the patient may contact in case of any concern or query.

    Tooth Extraction AfterCare

    Tooth Extraction AfterCare